Cutting short logs actually costs more than cutting large pieces of logs. There are a number of reasons behind this. You have to attach more arms to support the small logs. Moreover, you have to figure out where to put the log.
So, how to cut short logs on a portable sawmill?
Well, it’s neither too easy nor too hard. But we hope that we can explain the process in the easiest way we can.

In this article, we’ll discuss a number of topics from why you should cut your own logs to what you need to know about portable sawmills. And most importantly, we’ll give an easy 7-step guide for cutting short logs with a portable sawmill.
Without further delay, let’s start-
Why Cut Your Own Logs?
There are tons of benefits you get from cutting your own logs instead of buying it from a log yard. Apart from the satisfaction of cutting your own logs, you’ll find out that there are a few other advantages.
First of all, you’ll save a huge amount of money per board. Moreover, when you air dry your logs by yourself, there will be a lot of wood for you to use.
Second, as we all know kiln-dried wood is not so good. Chances are it’ll chip due to its supplementary brittle nature. However, air-dried wood isn’t like that. Power tools and air-dried wood go side-by-side, unlike kiln-dried wood.
That’s why cutting your logs and air drying them is always the option. And if your target is to make high-quality furniture, then you shouldn’t look elsewhere.
But there’s some bad news too. Well, it’s not really bad news, it depends on how far you plan into the future.
The thing about air-drying wood is that you have to wait at least one year for every inch of thickness your log is. So, planning ahead in the future is a really important factor in this scenario.
Nonetheless, the end result is always satisfying. The only downside is you’ll have to wait a bit.
What Do You Need to Know About Portable Sawmills?
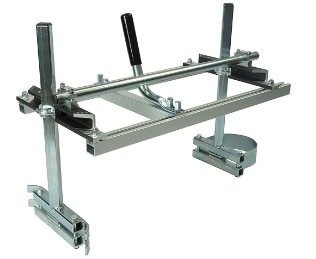
Portable sawmills are quite common and include a saw head consisting of two band wheels. They also have a steel band blade that’s surprisingly flexible and goes around the band wheels.
In addition, the frame includes a track that helps in guiding the saw’s head when cutting a log. This is actually very useful as it pushes the saw’s head through a log to cut it easily.
Well, enough talk about the sawmill’s build quality. Let’s see what you’re getting from a portable sawmill if you’re using it to cut short logs.
Production Rate
Portable sawmills can produce at least 100 board feet in an hour. And it can go up to more than 600 board feet depending on which model you have.
If your requirements aren’t high, you can go for a 10 HP manual sawmill. It’ll fulfill all your needs. But for higher production requirements, you need to invest in an automatic hydraulic sawmill.
Saw Kerf
Saw kerf basically means how thick your blade is. Most portable sawmills include a narrow blade. You see, a narrow blade helps to reduce waste, and most importantly, you’ll get more boards.
Also, a narrow blade ensures a smooth cut on the log. So, the surface will have a nice touch.
Blade Cost
Portable sawmill blades are quite inexpensive. Sometimes you’ll even get a discount if you buy them online. And the best part is, reshaping these things cost even less.
| Portable Sawmill Blade |
| Our Top Picks : Wood-Mizer 158″ 10° (Link from Amazon) |
Flexibility
Flexibility is both a pro and a con for portable sawmills. The con is that sometimes while using a portable sawmill, they can produce wavy boards. Also, the blades tend to stick or break at times. So, proper care is a must for these things.
Cutting Capacity
Portable sawmills can cut logs up to 40″ diameter. Sometimes, even more, depending on your model. Even if you have a small sawmill, it can still cut out a board with a 20″ width.
Price
Depending on which model and size you’re getting, the price can range from $3000 to $40000. While they cost a lot of money, you’ll get a lot of value if you use it the right way. Nonetheless, routine maintenance is something you can’t avoid with these things.
How to Cut Short Logs on a Portable Sawmill?
You’ve reached the core of the article. Now that you know everything about portable sawmills. Let’s talk about how you can cut short logs with it. We’ll guide you through the process with 7 easy steps.
Step 1: Mark Locations in the Miter Bar
First, you need to make a sled. Making a sled isn’t that hard. It’s basically made of ¾ inches of MDF that’s 10 inches in width and 2 feet in length.
Now, measure the distance between the blade and the miter track. Then, it’ll get transferred to MDF.
After you’re done, place an 18 inches long miter bar over the line. Then, put a mark on the location. This way you’ll be able to cut short logs efficiently.
Step 2: Connect the Miter Bar
Now that you’re completed step 1, it’s time to connect the miter bar on to the flat-headed machine screws. But before you do all that, the countersunk holes have to be drilled on the MDF.
You need to do something so that the logs don’t slip off the sled. For doing that, you need a proper sawmill operating system. The effective way to do that is to cut out a drawer liner and spray an adhesive spray to keep it in place.
Step 3: Make the First Cut
It’s time you make the first cut on your short log. While you are placing the log, you need to be absolutely sure that the log doesn’t do any kind of rocking there. Perhaps, a piece of wooden shim is what you need here.
Before you cut the piece of wood, you should have an image in your mind about what you’ll cut out from the log. After a while, it’ll be easier for you to figure out how to cut flat boards. Moreover, you’ll know how you’ll put the logs into the sawmill.
Step 4: Make the Second Cut
The first cut is an important one. If you could do that perfectly, this one will be easier for you. Now you may wonder the reason behind that. It’s because the first cut made the bottom surface flat, so placing the log is easier now.
The second cut actually wastes a little amount of wood for giving a flat surface. That’s why you should do the measurements beforehand.
However, if you have to make a lot of small pieces, then you’ll repeat the process as many times as you need.
Step 5: Cut Out the Boards
Most people who want to learn how to cut logs with a portable sawmill is because they’re planning on making boards. Chances are, you’re here for the same reason. So, now that we’ve explained how you can cut logs, let’s talk about boards.
First, you have to decide what thickness you want for your boards. Generally, people go for 1 inch thick boards.
After you’ve made the first two cuts, remove the sleds and prepare the whole fence of the portable sawmill.
You need to maintain a portable sawmill cutting pattern.. For getting the maximum number of boards from lumber, you may have to change the position of the lumber from time to time.
In simpler terms, the front side will rotate back and forth after each cut.
Step 6: Dry Out the Boards
The boards that you’ve made from the logs, have to go through a number of processes to make those usable. The first step is drying out all the extra moisture from boards.
Although there’s an easy and natural way to do it. In order to do that, you have to gather the boards in one place and let those dry out in the open air.
However, never put your boards in a place where it’ll get direct sunlight for a long time. Direct sunlight is bad for unprocessed boards. After a while, you’ll see the heat from the sun has cracked the boards.
Step 7: Smoothen Up the Boards
Once the boards dry out, you have to smoothen up the board. In addition to that, they need to be surfaced again.
Now, this process is done in many different ways by many people. No matter what you do, always check with a moisture meter to see if the boards have perfect moisture level or not.
After you’re done, cut off the outer sides of the boards and make them go through a number of planters and jointers. This will ensure that there aren’t any unsmooth surfaces there.
Wrapping Up
So, that’s all we had about how to cut short logs on a portable sawmill. Even though we tried to cover everything, there may have been some little details we’ve missed.
Share your experience with us and let us know how you did it. Good luck!


