Continuous contact with water makes the concrete lose its durability and increases the risk to grow molds. For that, it’s a smart move to make the concrete slab waterproof.
How to make waterproof concrete slab? Through applying a nice sealing product and a topcoat, you can make a waterproof concrete slab. For these, only a few steps, tools, and safety precautions are needed.

Let’s learn the process step by step down below-
Step 1- Prep The Surface:
The first step is to ensure that the concrete surface is clean and dry. Also, make sure it doesn’t have any unnecessary cracks or holes.
Before applying any sealing product to make the concrete waterproof, make sure that the weather is dry. Rain or moist weather can hamper the process.
Step 2- Apply The Sealer:
After ensuring your surface is clean, it’s time to apply the sealing product. You need to choose the perfect product according to your requirements.
Make sure the application is done following the package instructions. This will ensure the perfect result.
Step 3- Apply a Topcoat and Let it Dry:
Finally, add a topcoat of your choice and let the whole thing dry or cure. It’s effective to do so, because it makes the slab completely waterproof.
Let the whole thing dry for at least 24 hours. Some products might require 5 days to cure or dry.
How To Build A Concrete Slab?
If you’re wondering how to build a concrete slab but don’t know the process, then you’ve come to the right place! Keep reading below to know more!
How to build a concrete slab? You can build a concrete slab by following simple steps like making a frame, digging a surface, adding gravel bed, and finally pouring the concrete mix. These can be done smoothly in dry weather.
Let’s get to know the process elaborately from the following steps-
Step 1- Construct The Concrete Slab Frame
The first step of doing anything is always to make a plan. So, in this project too, first plan on the size and shape of your concrete slab.
Then, make a slab frame using wood accordingly.it on the surface where you plan on making the slab.
Step 2- Dig The Area and Add Gravel:
After marking the ground area with the frame, remove it. Place 4 stakes at the four corners of the marked-place.
Dig down the place at least 4”. Now, place the gravel evenly making it 4-inch thick.
Step 3- Prepare The Concrete Mix and Pour It:
Now, prepare the concrete mix of your choice. It’s important to make sure that the weather is not moist and is dry while working on this project.
After placing the frame on the gravel bed, using a hose, make the surface wet. Then, pour the concrete mix there till the top of the dogged place.
Step 4- Smoothen The Surface and Let It Dry:
Using proper tools, smoothen the concrete’s surface. Make sure to scrape off any excess product.
Let the whole thing cure for 48 hours and it’ll be done. You can also spray concrete seal and cure products for this step.
How To Pour A Concrete Slab For A House?
Did you know that you don’t need to hire anyone to pour a concrete slab for a house, rather you can do so by yourself? Well, if you didn’t, then keep on reading below and find out more about it!
How to pour a concrete slab for a house? You can easily pour a concrete slab for a house by following six simple steps. These are building the framework, measuring and digging the area, preparing the bedding, preparing the concrete mix, placing the slab, and finally curing it.
Follow the steps down below to pour a concrete slab for a house-
Step 1- Build The Framework:
Concrete related projects will always need a framework at first. Making a concrete slab for a house requires the same.
Using precise measurements of your choice, make a framework out of wood and use nails to attach the whole thing. Make sure the framework is strong and made after proper calculation.
Step 2- Measure and Dig The Area:
Using the framework, mark the area where you want the slab to be. Use a spade for this.
After measuring, remove the framework and dig out the place according to your required depth. Make sure to dig an extra 5 cm of depth for the bedding along with the one required for your concrete slab.
Step 3- Prepare The Bedding:
Now, place the framework back and it’s time to lay the bedding. You can use crusher dust or a bed of road base for this.
Lay the bedding making it 5 to 6 cm thick and level it. This is done to provide the slab with a sturdy base.
Step 4- Prepare The Concrete Mix:
Now, prepare the concrete mix of your choice according to the package instructions. Make sure to maintain safety precautions for this process.
Also, be careful to not add an unnecessary amount of water to your concrete mix. Because, it might damage the concrete’s quality.
Step 5- Place The Slab:
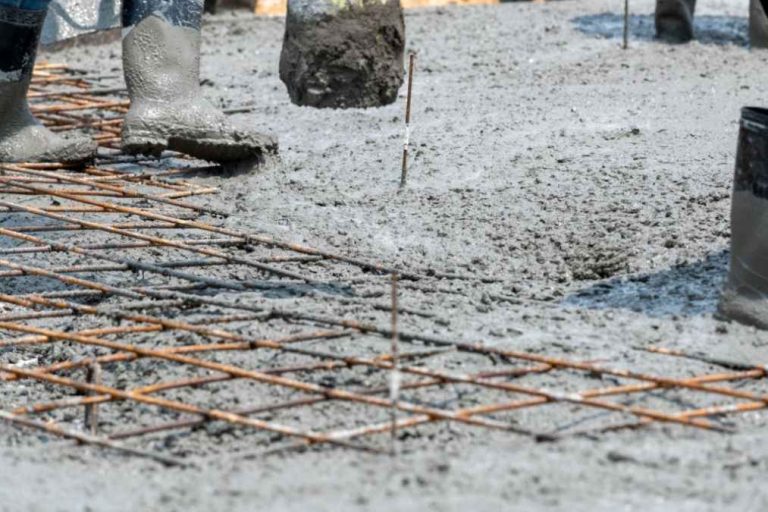
From one edge of the framework, start pouring the concrete mix and keep it spreading with a shovel. It’d be great if two people work simultaneously in this process. Make sure to leave no spot unfilled.
When the concrete becomes a bit dry, flatten it. If you want a rough surface, you can run a broom over it afterwards, to make patterns as per your wish. Run an edging trowel around the slab’s perimeter as per needed. You can also run a jointing trowel over the slab if it’s large enough for that to avoid cracks in future.
Step 6- Cure The Slab:
After you’re done with everything and prepared for obtaining the final result, let the slab cure. Before that, you need to remove the framework.
After a day you’ve poured the mix, you can take out the framework. Then, let the whole thing cure for a week and you’re good to go!
If you’re interested to know about best concrete stain, then read it for gathering up more knowledge.
Wrapping Up
DIY projects related to concrete slabs are simple to do. Proper instructions, necessary equipment, and precise planning make such work fun and saves money.
This article on how to make waterproof concrete slab covers necessary steps needed to be followed to make waterproof concrete slab, construct a slab, and how to pour such slab for a house. Hope the instructions will help you in your future projects. Best of luck!


