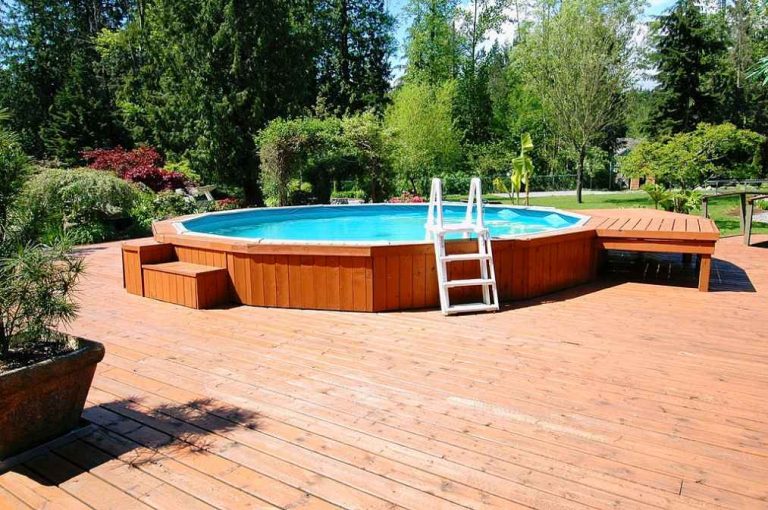
Yes, cracks in deck posts are a matter of concern. But, you should know that there are certain methods to fix them. On the other hand, if you know the reasons why cracks take place, you can take early precautions to not do them.
So, how does crack occur on wooden posts?
Well, cracks mainly occur due to the woods shrinking. Many think that it’s the excess overload that causes woods to crack but actually that’s not the issue. Normally, drying out of the woods causes wood to shrink.

But, how to repair cracked wood post?
Don’t fret, we’ve got your back. In case you’re observing cracks on your deck post, you can still fix them. In fact, we’ve compiled simple fixes for the deck posts in this article.
Moreover, we’ve even discussed the reasons that lead to this problem in the first place. Also, don’t miss out on the FAQ session in the end as it’ll clear out most of your confusion about this problem.
That being said, let’s begin.
Why Do Cracks Take Place in Deck Posts?
So, why does wood crack?
Well, cracks occur on deck posts as the wood shrinks. Here, dried out woods mainly contribute to wood shrinking. As a result, cracks take place on deck posts.
But are there other reasons that contribute to the cracking of woods?
Well yes, there are other reasons too. And, if you can identify the reasons that lead cracks on wood posts, you can take early precautions. It’s always better to have a proactive approach to a problem, isn’t it?
But, can you stain a deck in cold weather? And does that lead to cracks developing in decks?
Well, no cracks don’t develop due to any stains in deck posts. It mainly develops due to the woods shrinking. So, let’s look at the other reasons below:
â— Excess Moisture in Woods
When you install the wood in the decks, it’s essential that the wood is dry. If the wood isn’t dried completely, it’ll contain moisture. Hence, this moisture can contribute to further problems.
Turns out, it’s normal for woods to have water in them. But, you need to realize that woods need to be completely dry before installing them on deck posts.
Why is that an issue?
This is because dried woods contribute the deck posts in being dimensionally stable. So, if you have too much moisture, it’ll cause the woods to not be stable enough.
â— Weather Problems
By now, you’ll already know that certain moisture content is necessary for the woods to be stable. But, weather can affect the decrease in moisture of the wood cells.
As a result, it causes the wooden posts to not be stable enough and cracks to take place. On the other hand, the wood moves always. It moves by contracting and expanding due to the humidity of the sun.
But, the main concern isn’t wood moving. Even though the woods are screwed down to the ground by a Deck Screw, it’ll try to move. As a result, cracks will form in the woods. And yes, this is a concern.
â— Drying Effect
Around 60% of the time, cracks take place due to the shrinking of woods. But, you may ask why do woods dry out?
Well, the sun and its humidity are mainly responsible for the woods to dry out. So, you can consider it to be a natural cause. But, it’s not always natural. This is because if a block of wood becomes wet and later dries in the sun and this isn’t good for the wood cells.
Also, if this process continues for a long time and direct sun hits the wet woods, it’ll cause it to dry out faster.
â— Weak Posts
If you have an elevated deck post, make sure they’re supported by vertical posts. If they don’t have any support on them then they could easily form cracks or splits.
Also, water in the base of the post can cause serious damage to the wood fibers. This will cause the wood fibers to become soft. As a result, the stability deteriorates and cracks take place in the wooden posts.
The Fixes
By now, you’ll already know about the reasons that contribute to the cracks forming of the woods. But wait, let me tell you something.
Just because the cracks have formed in the woods, doesn’t mean you can’t fix them. If you can follow the simple fixes correctly, you can easily get rid of this problem.
So, without further ado, let’s look at what you should do to tackle this situation:
Tools
Yes, you’ll need a set of tools for the job. But, the tools are affordable and available. So, you won’t have to break your bank in the process. Let’s look at the tools:
- Protective Gloves (Link from Amazon)
- Putty Knife (Link from Amazon)
- Spatula (Link from Amazon)
- Timber Filler (Link from Amazon)
- Sand Paper (Link from Amazon)
- Sanding Block / Hand Block (Link from Amazon)
- Clean Cloth (Link from Amazon)
- Paint Brush (Link from Amazon)
- Primer (Link from Amazon)
- Deck Oil (Link from Amazon)
- Band Saw (Link from Amazon)
- Knife (Link from Amazon)
- Hammer (Link from Amazon)
- Glue (Link from Amazon)
- Chisel (Link from Amazon)
- Measurement Tape (Link from Amazon)
After you’re done managing the tools and also making preparations for the procedure, let’s start:
Method 1: Using Timber Fillers & Sealing Repair Afterwards
First of all, it’s important to locate where the cracks are taking place. This is because the cracks can spread throughout the wooden post. And, this will contribute to more damage.
So, how to stop a crack in wood from spreading?
Well, if you can locate and seal the cracks, it’ll do the trick. Let’s look at the step-step process:
Step 1: Apply Fillers in Woods
To start proceedings, take your putty knife to level the damaged area. However, you can also use a spatula as an alternative to a putty knife. After this, take the knife to apply the filler into the cracked area.
Here, try to level it up with the surface. This is because an uneven surface can contribute to more cracks/splits to take place. Apart from this, you can choose any filler that’s flexible and is good with outdoors.
Step 2: Apply Sand & Secure the Surface
After you apply the timber filler, make sure you give it time to cure. However, you’ll need to remove the excess timber or sand from the area. So, take the sandpaper or grit paper and stroke through the surface.
This will remove the excess filler and sand from the surface. Following this, wipe any dust or debris from the surface. Here, you can use any clean or dry cloth and that’ll do the trick.
Step 3: Seal Repair
Lastly, you’ll need to seal every repair in the damaged area. But, why is it essential to seal it? I mean you can leave it as it is, can’t you?
Well, it’s essential to seal the repair inside the damaged areas. This is because cracks can develop again if you don’t finish the work properly.
That being said, start using a paintbrush on the cracked area. Take decking oil to prevent any moisture from entering into the area. Following this, apply the decking oil on the paintbrush and gently stroke in the damaged area.
By doing this, you’ll seal off the repair that you did in the cracked area. As a result, no more cracks will develop from that area.
On the other hand, if you have a painted post, apply a primer on it. After that, finish it off by using exterior paint on the area.
Method 2: Fixing Cracks with Glue
In case you might be wondering how to repair split wood beams, let me tell you something.
If you can identify the cracked area and glue them tightly, that’ll do the trick. However, it isn’t as easy as it sounds. So, let’s look at the step-step process:
Step 1: Take Measurements & Cut Wood from the Measurements
Firstly, take a measurement tape and point out the cracked areas. Make sure to take the measurement a bit longer than the cracked areas.
After you’re done, take a band saw and start cutting the slices of wood from the measurement. Here, wear gloves and cut by imitating the shape of cracks. By following this process, cut six or eight slices.
Step 2: Fill the Cracks with Slices & Level it to the Surface
Start fitting the cracks with the slices. Make sure you’re using the knife to cut and fit the slices accurately into the cracks. After this, level them to the surface so that you don’t have an uneven surface.
Step 3: Sand the Slices & Put Glue
Use a hand block into the slices and sand them. Here, you’ll also need to use a grit paper to shape the slices into the cracks. However, you don’t have to fit them perfectly.
So, bevel one side with the sandpaper only. After this, mix the glue with a bit of water and start filling the cracks with glue. Here, you’ll need a paintbrush to stroke the glue.
Step 4: Stroke the Slice of Wood with Hammer and Push it Down
Use a hammer to gently tap the slice into the crack. Following this, push the slice down accurately into the crack. By doing this, the fibers of wood will mix and fill the crack strongly.
Remember to keep the glue and water as it is and let it dry for 24 hours. Lastly, scrape any residue from the cracked area.
Step 5: Use a Chisel & Sandpaper for Finishing Touches
Lastly, use a chisel to take off any part that’s not needed. And gently stroked with sandpaper to smoothen up the area.
Frequently Asked Questions
Is it normal for the wood to split?
Splits in wood can occur normally due to excess loads in the woods.
Will linseed Oil stop wood from cracking?
You can take linseed oil to give protection from wood cracking.
Wrapping Up
That’s all we have for you. By reading this article, you’ll know what to do when cracks in deck posts happen.
Moreover, we’ve even discussed the reasons for cracks formation in this article. Lastly, we’d like to tell you that wood checking prevention can reduce this problem.
In the end, it’s the maintenance of the deck posts that’ll keep them away from cracking. And even if cracks take place, you’ll know what to do. Good Luck.