Has the shingle roof your house become old and needs repairing? Shingle roofs are quite affordable and versatile but the problem is they don’t last that long.
So, what can you do? Should you replace the shingles?
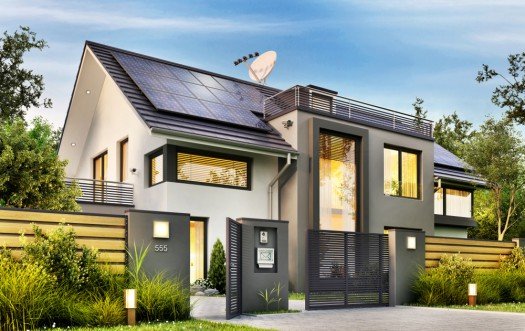
The answer is don’t replace them when there’s a better option. Metal roofs are a great substitute. They are both durable and good-looking.
Although installing a metal roof can be a bit of work. However, if you follow this guide properly we’re sure you can do it too.
Our 7 step guide of shingle to metal roof transition will cover everything you need to know about from the pros and cons of metal roofs to proper installation. So, without further ado let’s begin.
Can You Install Metal Roofs Over Shingles?
In short, yes you can install metal roofs over your shingles. Although, it’s better to check with your local building regulations before you make a decision.
The thing is, a lot of areas won’t allow you to re-roof over one layer of shingles. Whereas, many areas allow over two layers of shingles. However, the good news is you won’t face any issues if you only have one layer.
So, you can most certainly install metal roofs over shingles. But you do need to know about the advantages and disadvantages of a metal roof, right? Don’t worry, we’ll cover everything.
Pros of Metal Roofs
Metal roofs have many good features but there are even more when choosing to put them over shingles. First, let’s see the advantages of metal roofs in general.
Pros of Metal Roofs in General
- Metal roofs are gaining popularity among homeowners. These things have a reputation for longer lifetime and curb appeal.
- They’ll last a lot longer than shingles. As a matter of fact, these things can give service for about 40-70 years depending on the material.
- Metals roofs can withstand almost any type of weather. It doesn’t if it’s rainy or there’s a storm as these things can sustain wind up to 140 mph. Moreover, rainwater will dry easily and drain quickly.
- A lot of metal roofs can even withstand fire without taking damage. You never know when a bolt of lightning will strike or there’ll be a wildfire.
- Metal roofs come in many different styles and textures. So, you can easily choose something of your liking.
- Metal roofs are known for reflecting solar heat. This can improve your home’s energy efficiency. Who doesn’t love to reduce their cooling cost by 10-25%?
Pros of Metal Roofs Over Shingles
- You can save on labor costs by putting metal roofs over shingles. Also, you don’t have to find a place to store the shingles now.
- Metal roofs over shingles help you insulate your house even better. You see, it provides an extra layer for covering your home. The best thing is, it can reduce your cooling costs even more.
Cons of Metal Roofs
Like many other things, metal roofs have their fair share of disadvantages. Otherwise, you’d see everyone is using them.
- Metal roofs can be very expensive compared to shingles. Despite their durability, many homeowners can’t afford them. Even though these things increase the value of your property, price is a big factor here.
- These things offer great protection against a lot of things. However, when it comes to rain and hail sounds they can be quite noisy. You can add a layer of soundproof insulation but that just adds up even more money.
7 Step Guide of Shingle to Metal Roof Transition
Metal roofs can be a great addition to your home for the durability they provide. Alongside the appeal, they can withstand almost anything mother nature throws at them.
This guide will provide you step-by-step instructions on metal roof installation. You’ll also get to know about the types of metal you can use.
Tools
- Claw Hammers (Link from Amazon)
- Roofing Screws (Link from Amazon)
- Transition Flashing (Link from Amazon)
- Gutter Accessories (Link from Amazon)
- Drip Edge (Link from Amazon)
- Vent Pipe Flashing (Link from Amazon)
- Patches and Sealants (Link from Amazon)
Materials
- Work Boots (Link from Amazon)
- Safety Glasses (Link from Amazon)
- Welding Gloves (Link from Amazon)
1. Think About Your Options
Before you start installing your roof there are a few things to consider. Let us break it down. You need to know what type of metal you’re going to use. As we’ve discussed before, many metals can be expensive. So, let’s find out about the type of metals available.
Tin
Tin is an affordable option. It’s also the most commonly used metal for this purpose. Although most of the time it’s not pure tin, it’s galvanized steel or aluminum. However, tin has a bad habit of noise in times of rain.
Copper
Most people choose copper for its aesthetic looks. Other than that, copper won’t rust or need extra painting. Even though copper is a bit hard to install it can withstand almost any type of weather or fire.
Moreover, copper is quite lightweight so it won’t put any extra pressure on your house structure.
Aluminum
Aluminum is lightweight and rustproof. It’s also great for coastal climates for its resistance to saltwater. Although it can dent easily and needs to be painted.
Steel
Steel can be a bit costly but it can be a lifetime investment. Noise is not a factor if you’re putting it over shingles. Galvanized steel is the most common type of steel for this purpose.
Zinc
Zinc is a softer metal that can be damaged by extreme weather. Although it’s corrosion-proof so you can use it if you’re in a mild climate.
Corrugated Metal Roof Panels
These metals weren’t considered to be the best option for metal roofing. However, they are becoming popular because of their strength and energy-efficiency.
2. Measure The Roof Size
- Use measuring tools to find out the length and width of the roof.
- Set a carpenter’s level on the underside of one of the rafters in the attic. Calculate the vertical gap from the 12-inch mark on the level to the bottom of the same rafter.
- Multiplying the area by the slope will give you the total square footage of the area.
3. Cut Out Old Roofing
Before starting this step, we need to tell you one thing. You can choose to not remove your old roofing. It’s completely up to you. If you want to save up on labor costs, not removing your old roofing won’t be too much of a big deal.
However, if you want to remove your old roofing here’s the process.
- Starting from the top, remove the old shingles and other things like the flashing, underlayment, and vents.
- Make sure to hammer down any exposed large nails.
- Inspect the roof for any damage.
- Try to install roofing insulation if it covers your budget.
When removing the old roofing make sure to not damage your metal stud ceiling framing if you have one.
4. Install The Edging
- Edging is basically strips of metal eaves flashing. Use 1¼ nails to cover the outline of the roof.
- Make sure to place corner pieces so that the panels will meet altogether.
5. Install The Metal Panels
- Align the first panel in a way it overlaps the edging by ½ to ¾ of an inch.
- Install down the screws vertically along each of the ribs. Screw the first one about 7 inches from the bottom and rest of them about 18 to 24 inches apart.
- Don’t overtighten the screws. The washer under the screw head will seal the panel.
- Run a 100 percent silicone sealant bead along the underside of the next panel’s short edge. The silicone will spread and create a seal. Be sure to use a good silicone sealant. Here are some of the top quality silicone sealants you can use.
- Continue to add panels until your roof is covered. Note that, you might need to cut the panels for fitting them. For this, use a circular saw with a metal saw blade.
6. Install a Roof Ventilation
- When installing a roof vent, measure the ventilation unit and mark the area.
- Mark the outline of the roof cuts which is required and then use a skill saw to cut it. When done, you’ll be able to see the interior attic.
- Apply a layer of sealant around the edges of the hole and put the vent there.
- It’s better to apply a second layer of sealant around the vent. In this case, you can use a silicone spray. You should use a good quality silicone spray.
- Put a cover on the vent opening and make sure to screw it perfectly.
7. Install Flashing
- Flashing is a metal trim that fits over joints where two roof sections meet. It helps channel water from meeting places and keeps the roof dry.
- To fit over the top roof ridge and around the corners where the panels cross, stretch the flashing into a V-shape.
- The flashing will run one inch to the edge of the roof to help guide water.
Safety First
Safety should be your first concern before any kind of project. Moreover, when it comes to installing metal roofs ensuring safety is the most important step.
- Always wear gloves and safety goggles to prevent any kind of injuries.
- Make sure to remove any electrical wires or low branches from the roof.
- Wear proper safety shoes when working on a roof.
Wrapping Up
So, this sums up our guide on shingle to metal roof transition. Well, if the price of metal roofing is bugging you, we agree that metal roofing is expensive but it’ll last a long time.
For homeowners who want great protection for their house against wind, rain, and snow a metal roofing might be the best solution. Moreover, metal roofs are gaining popularity for their superior performance and appearance. So, now’s the perfect time for you to install a metal roof.