If you wish to repair concrete rainwater tank of yours, it can be a huge hassle for you. However, you can’t just replace the concrete tank like a plastic tank.
As a matter of fact, it might be regular to you if you own an old concrete water tank.
You might ask, “How should I do it? I am not a plumber or something.â€
That is why we are here. Today we’ll give you the guidance that will make it easier for you. If you just follow our instructions you can repair your water tank yourself in no time.

We’ll help you to know about the reasons, the things you will need and how you’re going to repair your concrete rainwater tank
Without further delay, let’s get into it.
Reasons for the Leak or Damage
Concrete water tanks are mostly found in the rural areas of your country. You see, they’re usually large in volume and some of them have been around for many years.
Most of the time, you’ll find people not taking proper care of it. That’s the reason which causes critical damage to it. You shouldn’t just assume that it’s going to last forever. Because nothing lasts forever without proper maintenance or care.
Cracking and leaking.
These are the main issues that you’ll face in the concrete tank. Here’re a few reasons for which your concrete tank might be damaged.
- Turns out, if the water inside your concrete water tank has been sitting around for a long time, there’s a possibility of disaster over the years.
Your tanks base can get weak especially to the wet side and you might see cracks soon. So, you have to keep the foundation dry and sit the tank on a properly constructed base.
- Now this is a major issue. If there are any trees or plants close to your tank, it might be in danger. The reason is that tree roots can penetrate small cracks or leaky parts of your tank.
Moreover, it can get worse for you with time. - Did you notice that the pressure from changes in the weight of the water inside the tank causes movement? Sure you didn’t.
However, for your old concrete tank it can result in cracking. - Moreover, if your tank had early maintenance leaking, there’s an interesting thing.
You see, the steel reinforcements inside the concrete walls and floors might be damaged because of wrong maintenance before. In this case for better concrete maintenance you can try quality concrete stain.
Unfortunately, it can make the situation worse for you causing large leaks. Therefore, your tank might allow the earlier breakdown of the strength of concrete surrounding the cracks through the entire wall or floor.
How Should You Start the Repair
We are sure that you want to repair your water tank. Though, you wouldn’t want to repair it again and again. Would you?
Repairing your rainwater tank is going to be effective only if you follow the right instructions. Well, there are some things you have to ensure before we start.
Get Equipments
Here’re the things that we’ll need to get started.
- Waterproofing membrane (Link from Amazon)
- Quick setting cement (Link from Amazon)
- Scraper or chipping hammer (Link from Amazon)
- Angle grinder or jackhammer (Link from Amazon)
- Pressure cleaner (Link from Amazon)
- Putty knife (Link from Amazon)
- Bucket (Link from Amazon)
Prepare Surface
Here’s the fact.
Your concrete water tank surface must be free from grease, oil, and other elements that might cause contamination.
Also, you should NOT polish the surface with things like a wire wheel or etc. However, you can use stuff like a scraper or a chipping hammer, angle grinder, jackhammer, or pressure cleaner. Moreover, you can use a degreaser to clean the oil and grease.
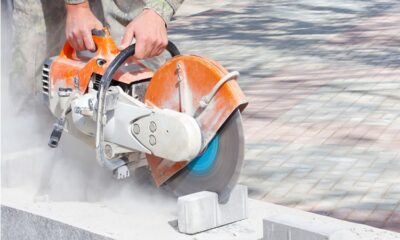
Remember, with a grinder or jackhammer you’re not here to cut concrete. You just have to remove the contaminants off the surface.
However, you have to repair your structure and maintain the basic structure.
Well, we are not done yet. Now, you have to make the surface wet and get it ready to apply some waterproofing cement.
Check Temperature
You might ask,
‘The temperature might be hot on summer days. What should I do at that time?’. Well, there’s a limitation to the temperature.
It’s best for you if you make sure that the temperature is within 15 to 24℃ when you apply the waterproof coating. Or else it might not be effective to the crack.
Mix the Coating
Now, you must mix your waterproof coating. Well, there are many waterproof coatings in the market. You’ll find that their mixing ratios are different.
Fortunately, most of them have a common ratio of 4:½ cup powder to 1 cup water. Well, it can vary depending on your conditions and situations.
However, you should only mix the amount that you are going to use in a very short time. Or else it’s not going to be effective enough on the leakage that you have.
Types of Waterproofing Method
Turns out, you can do this in only two methods. External waterproofing method and internal waterproofing method.
Now, we will give you a step by step tour.
External Waterproofing Method
Think about it.
If your whole tank structure is breaking, it’s not going to be any use if you try to repair a leak.
So, before you start to take care of the leak, you need to make sure that the tank is structurally sound and leaking cracks are not flexing.
Now, let’s dive into the process of fixing your leak.
- You need to remove all render, paint, or other material from the substrate. Then, pressure clean to remove anything on the surface.
- If you see any cracks or voids wider than 1mm, it should be ground open. However, you should avoid cutting or shaping it with a chisel. Because the impact may cause other areas to leak.
- If there is flowing water, you must apply quick-setting hydraulic cement. You see, they stop the flowing water instantly for you so that you can start working.
- Now, apply the first coat of waterproof membrane coating approximately 150 mm – 200 mm each side of the crack. Also, you can use masking tape along edges for a neat finish.
- Then, leave it overnight. We will recommend for 14 hours minimum. Because you need to dry it well before you start using another coat over it.
- After that, if there’s any cracks still leaking, seal them with quick setting hydraulic cement. When you are done, apply the second coat of waterproof membrane coating.
- However, it doesn’t matter whether you are coating just the crack or the entire external surface of the tank. We recommend you to use the coating roughly 2.5 Kg of product per square meter.
Therefore, if you didn’t achieve this ratio, you should apply a third coat.
Now, let’s see the internal waterproofing method.
Internal Waterproofing Method
In this method, you must enter the tank. Before you enter your water tank, open all external drains, and ventilate the tank. You must make sure that the air is breathable.
Carbon Dioxide displaces Oxygen inside the tank. It can be harmful to you after some time. Also, make sure that the tank is structurally sound and leaking cracks are not flexing.
Now, let’s get started.
- You need to remove all render, paint, or other material from the substrate. Then, pressure clean to remove anything on the surface.
- If you see any cracks or voids wider than 1mm, it should be ground open. However, you should avoid cutting or shaping it with a chisel. Because the impact may cause other areas to leak.
Now, we strongly recommended that if you also see the crack on the outside of the water tank, you should repair it as per our previous section. - Next, you must fix the floor or wall joints. So, you should seal the crack with quick setting hydraulic cement. Make a coving and apply it there.
- Now, apply the first coat of waterproof membrane coating to the entire internal area. Then, leave it overnight. We recommended you to keep it like that 14 hours minimum between coats.
- After that, you must apply the second coat of waterproof membrane coating.
- However, your tank surface needs roughly 2.5 pounds of product per square feet. Therefore, if you didn’t achieve this ratio, you should apply a third coat.
- After you have applied the final coat, leave it for a minimum of 7 days before filling the tank with water.
Now, if you have a plastic tank you might need to use silicone sealant. So, get the best silicone sealantin the market and seal your tank.
Tips
You might often see that the water is running down a vertical crack. However, most of the time it washes the material off.
Here’s the hack.
You must find the exact point of the leak. When you find it, apply a blow with a hammer/chisel.
Now, you might be wondering what will happen if you do that.
Well, this will compress the material into the leak. Then, it temporarily reduces the flow of water when you are applying the material.
Don’t be shocked, it’s just easy science.
You might be wondering, what should you do if you want to move your tank on your roof. Well, you can if you have a strong roof. However, if you have a shingle roof, you must consider shingle to metal roof transition.
Also, you should avoid moving the tank to the roof if the roof has a metal stud ceiling framing.
Safety Kits
Some of the elements might harm your skin and eyes in the process. Here are the things you will need for your safety.
- Thick rubber gloves (Link from Amazon)
- Eye protection goggles (Link from Amazon)
If you follow the Internal waterproofing method, you must get into a confined space. You must make sure that there’s enough oxygen for you to breathe.
You don’t want to suffocate for just fixing your rainwater tank.
Conclusion
You should keep an eye on your concrete rainwater tank from time to time. The way to repair concrete rainwater tank is different from that of a plastic tank.
However, you must do any repair when needed. Because if you put it off for another time, it can cost you 10x more than doing it on time.
The bottom line?
Prevention is better than cure. So, you should always focus more on proper maintenance. That way, you might not even need difficult repairs.
Now, let’s start fixing…